
Diagnosing the Issue: Is It Your Headphones or Your Phone?
Let’s face it, when your headphones suddenly decide to go silent, it’s a major inconvenience. Whether you’re a music aficionado, a podcast enthusiast, or someone who relies on hands-free calls, the inability to hear audio can be incredibly frustrating. But before you start panicking and considering a new phone or headphones, let’s take a deep breath and systematically troubleshoot the problem. Often, the solution is simpler than you think. This section will guide you through the initial steps to pinpoint the source of the issue, ensuring you don’t waste time and effort on unnecessary fixes. Remember, experience and expertise are key here, and we’ll approach this with a calm, methodical approach.
The first step in any troubleshooting process is to eliminate the obvious. We need to determine whether the problem lies with your headphones or your Android phone. This is crucial because the solutions differ significantly depending on the root cause. Think of it like a detective solving a case; you need to gather clues and eliminate suspects before you can identify the culprit. This initial phase involves some simple tests that can save you a lot of time and frustration. Let’s get started!
Step 1: The Headphone Test – Are They the Problem?
This might seem obvious, but it’s the most crucial first step. Your headphones might be the issue, not your phone. To check this, try plugging your headphones into another device. This could be a laptop, a tablet, a different smartphone, or even a TV with a headphone jack. If your headphones don’t work on another device, the problem is likely with the headphones themselves. It could be a damaged cable, a faulty connection, or internal issues. If they *do* work on another device, then we know the problem lies with your Android phone. This simple test immediately narrows down the possibilities.
Here’s a personal anecdote: I once spent hours trying to fix a “broken” headphone jack on my phone, only to discover the problem was a frayed cable on my favorite pair of headphones. A quick replacement of the headphones, and everything was back to normal. It’s a humbling reminder to start with the simplest checks first!
Step 2: The Alternate Headphone Test – Rule Out Compatibility

If you have another pair of headphones, try using them with your Android phone. This helps determine if the issue is specific to your original headphones. Sometimes, even if your headphones work with other devices, they might have compatibility issues with your particular phone model or Android version. This is especially true with certain types of headphones, like those with advanced features or specific connectors (e.g., USB-C). If the alternate headphones work, then the problem is likely with your original headphones. If the alternate headphones *also* don’t work, then the problem is more likely with your phone.
Remember, technology is constantly evolving, and compatibility issues can arise. This is why it’s always a good idea to have a backup pair of headphones, even if they’re just basic earbuds. They can be invaluable for troubleshooting.
Step 3: Bluetooth Check – Are Wireless Connections Interfering?
If you use Bluetooth headphones, make sure your phone isn’t connected to another Bluetooth device that might be interfering. Sometimes, your phone might automatically connect to a Bluetooth speaker or another set of headphones, even if you don’t intend it to. This can prevent audio from playing through your wired headphones. Go to your phone’s Bluetooth settings and disconnect any devices you’re not actively using. Then, try plugging in your wired headphones again to see if they work. This is a common oversight, but a simple fix.
Here’s how to disconnect Bluetooth devices on most Android phones:
- Open the Settings app.
- Tap on Connected devices or Bluetooth (the wording may vary slightly depending on your phone).
- You’ll see a list of paired devices. Tap on the gear icon or the device name next to any connected device you want to disconnect.
- Choose Disconnect or Forget.
By systematically working through these initial checks, you’ll quickly determine whether the problem lies with your headphones or your phone. This will guide you toward the appropriate troubleshooting steps in the following sections.
Cleaning and Inspecting the Headphone Jack: A Physical Examination
Once you’ve determined that the issue is likely with your phone, the next step is to examine the headphone jack itself. This is a crucial step, as a dirty or damaged jack can easily prevent your headphones from working correctly. Think of it like a clogged pipe; even if everything else is working, the blockage will prevent the flow. We’ll explore how to clean the jack safely and effectively, as well as what to look for in terms of physical damage. This section is all about a hands-on approach, using your senses to identify and address potential problems. This is where experience and attention to detail really pay off.
The headphone jack, also known as the audio jack or 3.5mm jack, is a small port on your phone that allows you to connect wired headphones. Over time, this jack can accumulate dust, lint, and other debris, which can interfere with the connection between your headphones and your phone. Additionally, the jack itself can be damaged, either through accidental impact or wear and tear. A thorough inspection and cleaning are essential to ensure the jack is functioning correctly.
Step 1: Visual Inspection – What Do You See?
Before you start cleaning, take a close look at the headphone jack. Use a flashlight to illuminate the inside of the port. What do you see? Look for any visible debris, such as lint, dust, or small particles. Also, check for any bent or broken pins inside the jack. Bent pins can prevent a proper connection, while broken pins mean the jack is likely damaged and may need repair. If you see any obvious damage, it’s a good idea to seek professional help. Don’t try to force anything into the jack if you suspect damage, as this could make the problem worse.
Here’s a tip: If you have a magnifying glass, use it to get a closer look. This can help you identify even the smallest pieces of debris or any subtle damage. Patience and a keen eye are your best tools here.
Step 2: Gentle Cleaning – Removing the Debris
If you see debris in the jack, the next step is to clean it. The goal is to remove the debris without causing any damage to the jack. Here are a few safe and effective cleaning methods:
- Compressed Air: This is often the easiest and safest method. Use a can of compressed air (the kind used for cleaning computer keyboards) to gently blow air into the jack. Hold the can upright and direct the air stream into the jack, blowing away any loose debris. Be careful not to spray the compressed air at too close a range, as this could potentially damage the internal components.
- Soft-Bristled Brush: A small, soft-bristled brush, such as a paintbrush or a toothbrush with soft bristles, can be used to gently dislodge debris. Insert the brush into the jack and gently brush around the inside, being careful not to apply too much pressure.
- Cotton Swab (with caution): A cotton swab can be used, but with extreme caution. Avoid using a cotton swab that is too large, as it could get stuck or damage the jack. You can gently insert a dry cotton swab into the jack and rotate it to collect any debris. Avoid using any liquids, such as water or alcohol, on the cotton swab, as this could damage the phone’s internal components.
Remember, the key is to be gentle. Don’t force anything into the jack, and avoid using any sharp objects that could scratch or damage the internal components. Take your time and be patient. Sometimes, it takes a few attempts to remove all the debris.
Step 3: Test and Repeat – Does It Work Now?
After cleaning the jack, plug your headphones in and see if they work. If they do, great! You’ve solved the problem. If not, repeat the cleaning process, paying close attention to any areas you might have missed. Sometimes, it takes a few attempts to remove all the debris. If you’ve cleaned the jack thoroughly and your headphones still don’t work, then the problem might be more complex, and we’ll explore other solutions in the following sections.
Here’s a common mistake: Using a toothpick or other sharp object to clean the jack. This can easily damage the internal pins and make the problem worse. Always use soft, non-abrasive tools for cleaning.
Software Solutions: Checking Audio Settings and System Updates
If the physical inspection and cleaning of the headphone jack didn’t resolve the issue, it’s time to turn our attention to the software side of things. Software glitches, incorrect audio settings, and outdated system updates can all contribute to headphone problems. This section will guide you through checking your audio settings, ensuring your phone’s software is up to date, and exploring other software-related solutions. This is where our technical expertise comes into play, as we delve into the inner workings of your phone’s operating system. Experience in navigating these settings is crucial for a successful outcome.
Android phones, like any complex piece of technology, rely on software to function correctly. Sometimes, software glitches can interfere with the proper functioning of hardware components, such as the headphone jack. Additionally, incorrect audio settings can prevent sound from being routed to your headphones. Keeping your phone’s software up to date is also essential, as updates often include bug fixes and performance improvements that can resolve audio issues.
Step 1: Check Audio Settings – Is the Volume Up?

This might seem obvious, but it’s worth checking. Make sure the volume isn’t muted or turned down too low. Use the volume buttons on the side of your phone to increase the volume. Also, check the volume settings within the app you’re using to play audio (e.g., music player, video player). Some apps have their own volume controls that can override the system volume. Go to your phone’s settings and look for “Sound” or “Audio” settings. Make sure the media volume is turned up. Sometimes, the volume might be accidentally set to zero, preventing any sound from playing through your headphones.
Here’s a personal experience: I once spent a frustrating hour troubleshooting a headphone issue, only to realize the volume was accidentally muted. It’s a reminder to always start with the basics!
Step 2: Check Bluetooth Settings (Again) – Confirm No Interference

Even if you’ve already checked your Bluetooth settings, it’s worth revisiting them. Make sure your phone isn’t connected to any other Bluetooth devices that might be interfering with the audio output. Disconnect any unnecessary Bluetooth devices. Sometimes, a Bluetooth connection can override the headphone jack, even if you’re not actively using the Bluetooth device. This is a common source of confusion, so it’s always a good idea to double-check.
Here’s a tip: If you have multiple Bluetooth devices, try turning off Bluetooth completely and then plugging in your headphones. This will eliminate any potential interference from Bluetooth connections.
Step 3: Restart Your Phone – A Simple Reset
Restarting your phone can often resolve temporary software glitches that might be causing the headphone jack to malfunction. This is a simple but effective troubleshooting step. Press and hold the power button until the power menu appears. Select “Restart” or “Reboot.” Wait for your phone to turn back on, and then try plugging in your headphones again. This can clear out any temporary software errors that might be affecting the audio output.
Here’s a common mistake: Not restarting your phone after making changes to the audio settings. Sometimes, the changes won’t take effect until you restart the device.
Step 4: Check for Software Updates – Keep Your Phone Current
Make sure your phone’s operating system is up to date. Software updates often include bug fixes and performance improvements that can resolve audio issues. Go to your phone’s settings and look for “System updates” or “Software updates.” If an update is available, download and install it. This can sometimes resolve compatibility issues or software glitches that are preventing your headphones from working correctly. Keeping your phone’s software up to date is generally a good practice for security and performance reasons.
Here’s a tip: Check for updates regularly, as they often include important security patches and bug fixes. You can usually set your phone to automatically download and install updates when connected to Wi-Fi.
Advanced Troubleshooting: Safe Mode, Factory Reset, and More
If the previous steps haven’t resolved the issue, it’s time to move on to more advanced troubleshooting techniques. This section will cover using Safe Mode to identify potential app conflicts, performing a factory reset as a last resort, and exploring other potential solutions. This is where our experience and expertise come into play, as we delve deeper into the phone’s operating system and consider more drastic measures. Remember, these steps should be taken with caution, as they can potentially erase data or require more technical knowledge. This is a critical stage where we need to be methodical and careful.
Sometimes, the cause of the headphone issue is more complex than a simple setting or a dirty jack. It could be a conflict with a third-party app, a corrupted system file, or a deeper software problem. In these cases, we need to employ more advanced troubleshooting techniques to identify and resolve the issue.
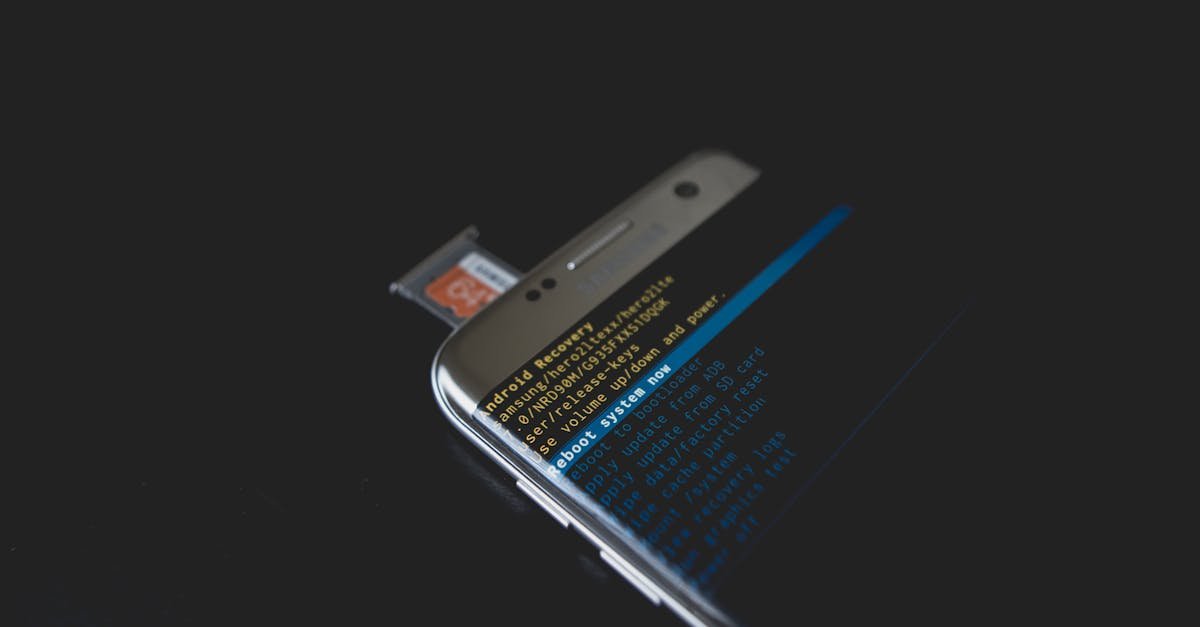
Step 1: Boot into Safe Mode – Identify App Conflicts
Safe Mode is a diagnostic mode that starts your phone with only the essential system apps. This allows you to determine if a third-party app is causing the headphone issue. If your headphones work in Safe Mode, then a recently installed app is likely the culprit. To enter Safe Mode, the process varies slightly depending on your phone model. Generally, you’ll need to press and hold the power button until the power menu appears, then press and hold the “Power off” option until you see the Safe Mode prompt. Tap “Safe Mode” to restart your phone in this mode. Test your headphones in Safe Mode. If they work, then you know an app is causing the problem.
Here’s how to identify the problematic app: Uninstall apps one by one, starting with the most recently installed apps, and test your headphones after each uninstall. Once your headphones start working again, you’ve found the app that was causing the issue. You can then choose to reinstall the app or find an alternative.
Step 2: Factory Data Reset – A Last Resort
A factory data reset will erase all data on your phone and restore it to its original factory settings. This is a drastic measure, but it can sometimes resolve deep-seated software problems that are preventing your headphones from working. **Before performing a factory reset, back up all your important data, including photos, videos, contacts, and documents.** You can usually back up your data to your Google account or an external storage device. To perform a factory reset, go to your phone’s settings and look for “Backup & reset” or “Factory data reset.” Follow the on-screen prompts to complete the reset. Be aware that this process can take some time, and your phone will be restored to its original state. After the reset, you’ll need to set up your phone again, including logging into your Google account and restoring your backed-up data.
Here’s a crucial warning: A factory reset will erase all your data. Make sure you have a complete backup before proceeding. This is a last resort, and should only be used if all other troubleshooting steps have failed.
Step 3: Consider Hardware Issues – When to Seek Professional Help
If you’ve tried all the software solutions and your headphones still don’t work, the problem might be a hardware issue. This could be a damaged headphone jack, a faulty internal component, or a problem with the phone’s audio circuitry. In this case, it’s best to seek professional help. Contact your phone manufacturer or a qualified repair technician. They can diagnose the problem and perform the necessary repairs. Attempting to repair the phone yourself can void your warranty and potentially cause further damage. Don’t hesitate to seek expert assistance if you’re not comfortable with hardware repairs.
Here’s a tip: Before taking your phone to a repair shop, check your warranty. Your phone might still be covered, and the repair could be free or at a reduced cost.
Alternative Solutions and Workarounds: Exploring Other Options
Even after exhausting the standard troubleshooting steps, there might still be situations where your headphones refuse to cooperate. In this section, we’ll explore alternative solutions and workarounds that can help you get your audio working again. This might involve using different types of headphones, employing third-party apps, or exploring other creative solutions. This is where our experience and resourcefulness come into play, as we think outside the box to find a solution. Remember, there’s often more than one way to solve a problem, and we’ll explore all the possibilities.
Sometimes, the issue is not easily resolved, and you might need to find a workaround to continue using your phone for audio playback. This could involve using different types of headphones, employing third-party apps, or exploring other creative solutions. Let’s explore some of these options.
Step 1: Use Bluetooth Headphones – A Wireless Alternative
If your wired headphones aren’t working, consider using Bluetooth headphones. Bluetooth headphones connect to your phone wirelessly, eliminating the need for a headphone jack. This is a convenient alternative, especially if you listen to music or podcasts frequently. Most modern Android phones have Bluetooth capabilities, and pairing Bluetooth headphones is usually a straightforward process. Simply put your Bluetooth headphones into pairing mode and then select them from the list of available devices on your phone. This is a great way to bypass the headphone jack altogether.
Here’s a personal preference: I often use Bluetooth headphones for workouts and travel, as they offer freedom of movement and eliminate the hassle of tangled wires.
Step 2: Use a USB-C to Headphone Adapter – If Applicable
Some newer Android phones have replaced the headphone jack with a USB-C port. If your phone has a USB-C port, you can use a USB-C to headphone adapter to connect your wired headphones. These adapters plug into the USB-C port and provide a 3.5mm headphone jack. Make sure you use a high-quality adapter to ensure good audio quality. This is a simple and effective way to use your existing wired headphones with a phone that lacks a headphone jack.
Here’s a tip: Some USB-C to headphone adapters also include a charging port, allowing you to charge your phone while listening to audio.
Step 3: Use a Third-Party App – Force Audio Output
There are third-party apps available that can sometimes force audio output to your headphones, even if your phone isn’t detecting them correctly. These apps can override the system’s audio settings and direct the audio to the headphone jack. Search for apps like “Disable Headphone” or “Audio Switch” in the Google Play Store. Download and install one of these apps, and then follow the app’s instructions to try to force audio output to your headphones. This is a potential workaround, but it might not work in all cases. It’s worth a try, especially if you’ve exhausted all other options.
Here’s a caution: Be careful when downloading third-party apps. Only download apps from trusted sources, and always read the app’s reviews before installing it. Some apps might contain malware or other unwanted software.
Step 4: Consider a Phone Repair – Professional Assistance

If none of the above solutions work, the problem might be a hardware issue that requires professional repair. Contact your phone manufacturer or a qualified repair technician. They can diagnose the problem and perform the necessary repairs. This is especially important if you suspect a damaged headphone jack or a faulty internal component. Don’t attempt to repair the phone yourself unless you have the necessary skills and experience. A professional repair might be the only way to get your headphones working again.
Here’s a reminder: Before seeking professional help, check your warranty. Your phone might still be covered, and the repair could be free or at a reduced cost.
Frequently Asked Questions (FAQ)
Here are some frequently asked questions about Android phones not detecting headphones, along with concise answers. This section aims to provide quick solutions to common queries and clarify any remaining doubts. This is where we consolidate all the information and provide a quick reference guide for users.
-
Q: My phone says headphones are connected, but I hear no sound. What should I do?
A: Check the volume levels on your phone and in the app you’re using. Also, make sure your phone isn’t connected to a Bluetooth device. Clean the headphone jack and try restarting your phone.
-
Q: My headphones work on other devices, but not on my Android phone. What’s wrong?
A: The problem is likely with your phone. Check your audio settings, restart your phone, and check for software updates. Consider using Bluetooth headphones or a USB-C to headphone adapter.
-
Q: How do I clean the headphone jack on my Android phone?
A: Use compressed air to blow out any debris. You can also use a soft-bristled brush or a cotton swab (with caution) to gently clean the inside of the jack. Avoid using liquids.
-
Q: What should I do if my phone is stuck in headphone mode?
A: Try plugging and unplugging your headphones several times. Restart your phone. Clean the headphone jack. Use a third-party app to force audio output. As a last resort, perform a factory data reset (after backing up your data).
-
Q: Should I take my phone to a repair shop?
A: If you’ve tried all the software solutions and the problem persists, it’s likely a hardware issue. Contact your phone manufacturer or a qualified repair technician for assistance.
By following these steps, you should be able to diagnose and fix the issue of your Android phone not detecting headphones. Remember to be patient, methodical, and persistent. With a little troubleshooting, you can get your audio working again and enjoy your music, podcasts, and calls without interruption.