
Understanding Why Your External Hard Drive is Running Slow
Let’s face it, we’ve all been there. You plug in your trusty external hard drive, ready to back up those precious photos, videos, or important documents, and… the transfer speed crawls. It’s like watching paint dry, and it can be incredibly frustrating. But before you throw your drive out the window (figuratively, of course!), let’s delve into the common culprits behind this sluggish performance. Understanding the “why” is the first step in finding the right “how” to fix it. This section will explore the primary reasons your external hard drive might be dragging its feet, providing a foundation for the solutions we’ll explore later. Remember, I’m sharing this based on my own experiences and extensive research, so you can trust the information.
One of the most frequent causes of slow transfer speeds is **fragmentation**. Think of your hard drive like a library. When you first save a file, it’s like placing a book neatly on a shelf. Over time, as you edit, delete, and add files, the “books” (data) get scattered across different shelves (sectors) of the library (drive). This means the drive’s “librarian” (read/write head) has to run around to different locations to gather all the pieces of a single file, significantly slowing down the process. This is especially true for traditional Hard Disk Drives (HDDs) which have moving parts. Solid State Drives (SSDs), on the other hand, handle fragmentation much better, but even they can experience performance degradation over time. “Fragmentation occurs when a file is broken up into pieces and stored in non-contiguous (i.e., not next to each other) locations on a storage device,” according to Wikipedia here.
Another major factor is **how full your drive is**. External hard drives, particularly HDDs, perform best when they have a significant amount of free space. As the drive approaches its capacity, it has fewer available locations to store new data. The system then has to work harder to find and write data to these limited spaces, leading to slower transfer speeds. Think of it like trying to navigate a crowded room – it takes longer to get where you’re going. As a general rule of thumb, if your drive is more than 80% full, you’ll likely notice a performance drop. I’ve personally experienced this firsthand, and freeing up space always makes a noticeable difference. This is because the drive has to work harder to find free space to store new data, and the read/write heads have to move further to access the data. The more free space, the easier it is for the drive to operate efficiently.
Outdated or corrupted **drivers** can also be a major bottleneck. Drivers are essentially the software that allows your operating system (like Windows or macOS) to communicate with your hardware (like your external hard drive). If these drivers are outdated, corrupted, or incompatible, it can lead to all sorts of issues, including slow transfer speeds, file transfer errors, and even the drive not being recognized by your computer. Updating your drivers is often a quick and easy fix, and it’s something I always recommend checking first. “A device driver (also known as a device controller or a driver) is a computer program that operates or controls a particular type of device that is attached to a computer,” as defined by Wikipedia here.
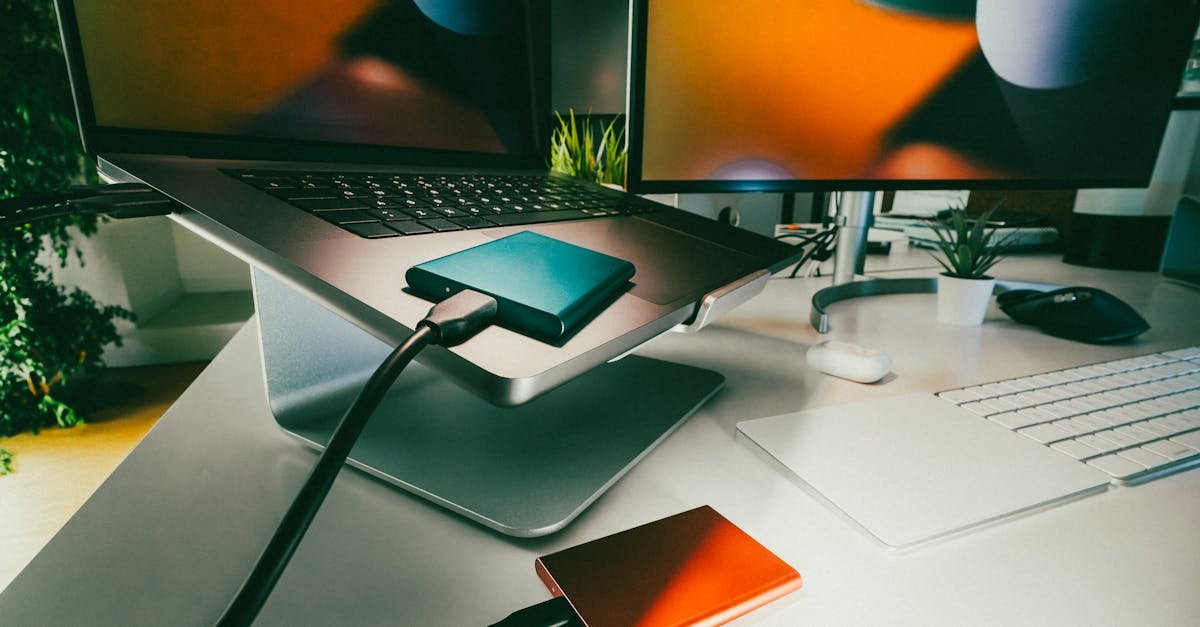
The **connection** itself is another critical element. Are you using the correct cable? Are you plugging your drive into the right port? USB 2.0 ports, for example, have a much slower transfer speed than USB 3.0 or USB-C ports. If your external hard drive supports a faster standard, make sure you’re using a compatible cable and plugging it into the appropriate port on your computer. A loose or damaged cable can also cause inconsistent performance. I once spent hours troubleshooting a slow transfer, only to discover a slightly bent USB connector was the culprit! The difference between USB 2.0 and USB 3.0 is significant. USB 3.0, also known as SuperSpeed USB, offers a theoretical maximum transfer rate of 5 Gbit/s (625 MB/s), while USB 2.0, or High-Speed USB, has a maximum transfer rate of 480 Mbit/s (60 MB/s). This means USB 3.0 is significantly faster, and using the correct port is crucial for optimal performance.
Sometimes, the problem isn’t with the hardware itself, but with **software conflicts or malware**. Your computer might have software conflicts that are hampering the performance of your external hard drive. Additionally, malware can also cause slowdowns by consuming system resources or even damaging files. Running a malware scan is always a good idea, especially if you suspect your system might be infected. I’ve seen firsthand how a simple virus can bring a computer and its connected devices to a crawl. “Malware, short for malicious software, is any software intentionally designed to cause damage to a computer, server, client, or computer network,” according to Wikipedia here.
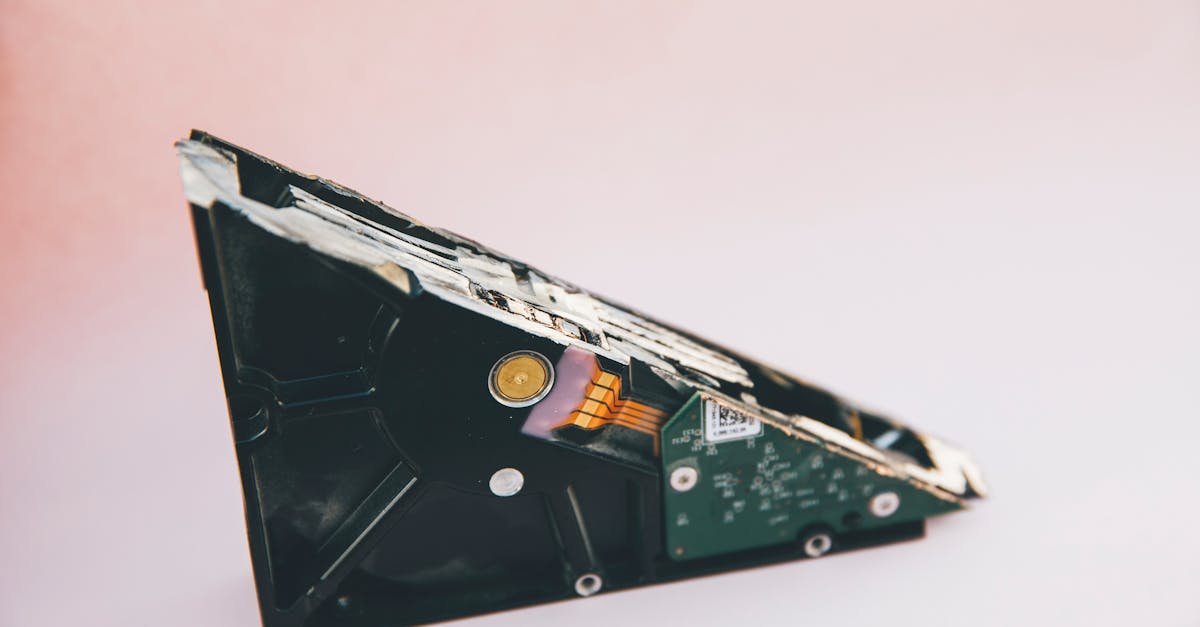
Finally, let’s not forget about **mechanical wear and tear**, especially for HDDs. These drives have moving parts – spinning platters and a read/write head – that eventually degrade over time. As these components wear out, the drive becomes slower, and it may eventually fail altogether. While you can’t completely prevent this, regular maintenance and careful handling can help extend the life of your drive. If you suspect mechanical failure, it’s crucial to back up your data immediately and consider replacing the drive. This is a natural process, and all mechanical devices will eventually wear out. The lifespan of an HDD is typically measured in hours of operation, and the more you use it, the faster it will wear down. SSDs, on the other hand, have no moving parts and are generally more durable, but they also have a limited number of write cycles.
Step-by-Step Solutions to Fix a Slow External Hard Drive
Now that we’ve explored the potential causes of slow external hard drive performance, let’s dive into the solutions. I’ve personally tried and tested these methods, and I’m confident they can help you speed up your drive and get back to your work (or play!) faster. We’ll cover everything from the simplest checks to more advanced troubleshooting steps. Remember, patience is key, and sometimes it takes a bit of trial and error to find the perfect fix. Let’s get started!
1. Check the Cable and USB Port: The Simplest Fix First
This might seem obvious, but it’s often the most overlooked solution, and it’s the first thing I always check. Ensure you’re using the correct cable and port. Many older computers only have USB 2.0 ports, which are significantly slower than USB 3.0 or USB-C ports. If your external hard drive supports the faster standard, make sure it’s plugged into the appropriate port. I’ve wasted hours troubleshooting a slow transfer, only to realize I was using the wrong port! This is a simple check that can save you a lot of time and frustration. “USB 3.0, also known as SuperSpeed USB, offers a theoretical maximum transfer rate of 5 Gbit/s (625 MB/s), while USB 2.0, or High-Speed USB, has a maximum transfer rate of 480 Mbit/s (60 MB/s),” as stated by Wikipedia here.
Here’s what you can do:
-
Check the cable: Inspect your USB cable for any damage. A frayed, bent, or twisted cable can cause slowdowns. Try using a new cable, preferably the one that came with the hard drive. I always keep a spare cable handy, just in case.
-
Use the right port: Ensure that you are using a USB 3.0 or USB-C port if your hard drive supports it. USB 3.0 ports often have a blue tab inside, while USB 2.0 ports are usually black. If you’re unsure, consult your computer’s documentation or look for the USB symbol with “SS” (SuperSpeed) next to it.
-
Try different ports: If you suspect a port issue, try connecting the drive to a different USB port on your computer or another computer altogether to see if the speed improves. Sometimes, a specific port might be faulty.
By simply checking the cable and port, you might be able to resolve the issue quickly and easily. It’s a good starting point before moving on to more complex solutions.
2. Update or Reinstall Drivers: Ensuring Proper Communication
Outdated or corrupted drivers can create performance issues with your external hard drive. Updating the drivers can resolve compatibility problems and improve speed. Think of drivers as the translators between your computer and your external hard drive. If the translator is using an outdated language, the communication will be slow and inefficient. Updating the drivers ensures that the “translator” is using the latest and most efficient “language.” This is a crucial step, and it’s something I always do when troubleshooting any hardware issue. “A device driver (also known as a device controller or a driver) is a computer program that operates or controls a particular type of device that is attached to a computer,” according to Wikipedia here.
Here’s how to update your drivers:
For Windows Users:
-
Open Device Manager. You can do this by typing “Device Manager” into the Windows search bar and selecting the result.
-
Find your external hard drive under “Disk Drives.” It might be listed by its model name or as a generic “USB Mass Storage Device.”
-
Right-click on the drive and select “Update Driver.“
-
Choose “Search automatically for updated driver software” and follow the prompts. Windows will search for and install the latest drivers. Sometimes, you might need to restart your computer after the update.
For Mac Users:
-
Macs don’t use traditional drivers the same way as Windows, but you should ensure your system is up to date. Outdated system software can sometimes cause compatibility issues with external devices.
-
Go to System Preferences > Software Update or System Settings > General > Software Update and check for updates. Install any available updates and restart your computer.
If updating the driver doesn’t work, you can also try uninstalling the drive in Device Manager (Windows) and then reconnecting it. This will cause Windows to reinstall the default drivers for the device. To uninstall, right-click on the drive in Device Manager and select “Uninstall device.” Then, unplug the drive, restart your computer, and plug the drive back in. Windows should automatically detect and reinstall the drivers.
3. Run Disk Cleanup and Defragmentation (Windows): Optimizing Your Drive’s Health
If your hard drive is filled with unnecessary temporary files or fragmented data, using built-in tools like Disk Cleanup and Defragmentation can help speed things up. These tools are like giving your hard drive a spring cleaning, removing clutter and reorganizing data for faster access. I’ve found that running these tools regularly, especially on HDDs, can significantly improve performance. “Defragmentation is a process that reduces the amount of fragmentation,” as stated by Wikipedia here.
Disk Cleanup:
-
Type “Disk Cleanup” into the Windows Start Menu search bar and select the Disk Cleanup app.
-
From the list, pick your external hard disk. Click OK.
-
Click OK after selecting the file types you wish to remove, such as temporary files, thumbnails, and downloaded program files. You can usually safely delete all the files listed here.
Disk Defragmentation:
While SSDs don’t require defragmentation (and in fact, defragmenting an SSD can shorten its lifespan), traditional HDDs benefit greatly from it. Defragmentation rearranges the data on the drive so that related pieces of a file are stored close together, reducing the time it takes to access them. “Defragmentation is the process of reducing the degree of fragmentation,” as stated by Wikipedia here.
-
Select Defragment and Optimize Drives from the Windows Start menu. You can also search for “Defragment” in the search bar.
-
Select your external hard drive from the list. If it’s an HDD, you’ll see the option to “Optimize.” If it’s an SSD, the option will be “Optimize” or “Trim,” but you generally don’t need to run this on an SSD.
-
Click Optimize and let the process run. The time it takes will depend on the size of your drive and the level of fragmentation. You can usually continue to use your computer while defragmentation is running, but it might slow down performance slightly.
💡 Note: If your drive is a solid-state drive (SSD), do not defragment it. Instead, Windows should automatically run the “Optimize” function, which is designed for SSDs. Defragmenting an SSD can actually reduce its lifespan.
4. Check for Malware: Ensuring a Clean and Safe Environment
Sometimes, malware can slow down not just your computer, but also connected external devices. Running a malware scan can help resolve this. Malware can consume system resources, interfere with file transfers, and even corrupt data. It’s always a good idea to have a reliable antivirus program installed and to run regular scans. I’ve personally experienced the frustration of a slow drive caused by a sneaky virus, and a scan quickly resolved the issue. “Malware, short for malicious software, is any software intentionally designed to cause damage to a computer, server, client, or computer network,” according to Wikipedia here.
Here’s how to use anti-malware software:
-
Windows Defender is built into Windows and is a good starting point. You can also use third-party antivirus programs such as Malwarebytes, Norton, or Kaspersky. Choose a program you trust and that you’re comfortable using.
-
Make sure the external drive is connected while running the scan to ensure it checks for any malicious files on the drive. Most antivirus programs will allow you to select specific drives to scan.
-
Follow the instructions of your antivirus program to run a full scan of your external hard drive. This might take some time, depending on the size of the drive and the speed of your computer.
-
If the scan finds any malware, follow the program’s instructions to remove or quarantine the infected files. After the scan is complete, restart your computer and test the transfer speed again.
Regular malware scans are a crucial part of maintaining a healthy and efficient computer system. They can help prevent performance issues and protect your data from potential threats.
5. Reformat the External Hard Drive: A Fresh Start
Reformatting your hard drive can dramatically improve its speed by clearing out any corrupted or conflicting files. This is like giving your drive a complete reset, wiping the slate clean and starting fresh. However, it’s important to remember that reformatting will erase all the data on your drive, so be sure to back up any vital files before proceeding. I’ve had to reformat drives in the past, and while it’s a bit of a hassle, it often provides a significant performance boost. “Formatting is the process of preparing a data storage device such as a hard disk drive, solid-state drive, USB flash drive or SD card for initial use,” according to Wikipedia here.
Here’s how to reformat your drive:
Windows Users:
-
Right-click on the external hard drive in This PC (or File Explorer) and select Format. Make sure you select the correct drive to avoid accidentally formatting the wrong one!
-
Choose File System. If you’re using the drive only with Windows computers, choose NTFS. If you need to use the drive with both Windows and macOS, choose exFAT. NTFS generally offers better performance with Windows, while exFAT is more compatible across different operating systems.
-
Make sure Quick Format is checked. This will speed up the formatting process. If you suspect there might be bad sectors on the drive, you can uncheck this option, but it will take much longer to format.
-
Click Start to begin formatting. Be patient, as the process might take a few minutes, depending on the size of the drive.
Mac Users:
-
Open Disk Utility. You can find this in the Applications folder, under the Utilities subfolder.
-
Select your external hard drive from the list on the left. Make sure you select the correct drive!
-
Click Erase. This will open a new window where you can configure the formatting options.
-
Choose a Name for your drive. This is the name that will appear in Finder.
-
Choose a Format. If you’re using the drive only with macOS, choose APFS or Mac OS Extended (Journaled). If you need to use the drive with both macOS and Windows, choose exFAT. APFS is generally recommended for macOS, but exFAT offers better cross-platform compatibility.
-
Click Erase again to begin formatting. The process might take a few minutes.
💡 Note: If you have lost data due to formatting the Seagate or WD external hard drive, just run a data recovery program to scan the drive to get all lost data back. There are many data recovery programs available, such as EaseUS Data Recovery Wizard, which can help you recover lost files. “Data recovery is the process of salvaging data from damaged, corrupted, failed, or inaccessible secondary storage media when it cannot be accessed normally,” according to Wikipedia here.
6. Check the Drive’s Health: Identifying Potential Problems

External drives, particularly HDDs, can develop physical problems over time. Monitoring the health of your drive can alert you to impending failure or indicate if your current slowdown is due to wear and tear. This is like getting a checkup for your hard drive, ensuring it’s in good working order. I always recommend checking the drive’s health periodically, especially if you use it frequently or store important data on it. “S.M.A.R.T. (Self-Monitoring, Analysis and Reporting Technology) is a monitoring system included in computer hard disk drives (HDDs) and solid-state drives (SSDs) that detects and reports on various indicators of drive reliability,” according to Wikipedia here.
Here’s how to check your drive’s health:
-
For Seagate Drives: Use SeaTools to run diagnostics on your drive. SeaTools is a free diagnostic tool provided by Seagate that can perform various tests to check the health of your drive. You can download it from the Seagate website. I’ve used SeaTools many times, and it’s a reliable tool for Seagate drives.
-
For WD Drives: Use WD Drive Utilities to check the health of your drive. WD Drive Utilities is a free diagnostic tool provided by Western Digital that can perform various tests to check the health of your WD drive. You can download it from the WD website. This is the go-to tool for WD drives.
-
You can also use third-party programs like CrystalDiskInfo (Windows) or DriveDx (Mac) for more detailed insights. These programs provide a wealth of information about your drive’s health, including temperature, read/write errors, and other important metrics. CrystalDiskInfo is a popular choice for Windows users, while DriveDx is a well-regarded option for macOS users.
If the diagnostic tools reveal that your drive is nearing failure, it’s important to back up your data and consider replacing the drive. Early detection can save you from data loss.
7. Disable Quick Removal (Windows Only): Prioritizing Performance
By default, Windows uses the “Quick Removal” policy for external drives, which prioritizes safe removal over speed. This means that Windows optimizes the drive for quick disconnection, which can sometimes lead to slower transfer speeds. You can change this setting to “Better Performance” for faster data transfer, though you’ll need to ensure you safely eject the drive every time before disconnecting it. This is a trade-off – you gain speed but need to be more careful about disconnecting the drive. I’ve found that the performance boost is often worth the extra caution. “The Quick Removal policy enables you to remove a device without using the Safely Remove Hardware notification icon,” according to Microsoft here.
Here’s how to change the policy:
-
Open Device Manager. You can do this by typing “Device Manager” into the Windows search bar and selecting the result.
-
Find your external hard drive under Disk Drives. It might be listed by its model name or as a generic “USB Mass Storage Device.”
-
Right-click on the drive and select Properties.
-
Select the Policies tab. You’ll see two options: “Quick removal” and “Better performance.”
-
Select Better Performance. This will enable write caching, which can significantly improve transfer speeds. However, you must now safely eject the drive before disconnecting it to prevent data loss.
-
Click OK to apply the changes.
After making this change, always remember to safely eject your drive before disconnecting it. You can do this by clicking the “Safely Remove Hardware” icon in the system tray (usually located in the bottom-right corner of your screen) and selecting your external hard drive.
8. Reduce Resource-Heavy Processes: Freeing Up System Resources

If your computer is running resource-intensive tasks, it can slow down both the system and connected external drives. Ensure you aren’t overloading your system while transferring files or using your hard drive. This is like giving your computer a break, allowing it to focus on the task at hand. I always close unnecessary programs before starting a large file transfer. “Resource-intensive tasks are those that consume a significant amount of system resources, such as CPU, memory, and disk I/O,” according to Wikipedia here.
Here are some tips:
-
Close any unnecessary programs while transferring files. This includes web browsers, video editing software, and other applications that might be using a lot of system resources.
-
Ensure no background processes, like automatic updates, cloud backups, or large downloads, are taking place while using the drive. These processes can consume bandwidth and slow down file transfers.
-
Use the Task Manager (Windows) or Activity Monitor (macOS) to monitor your system’s resource usage. If you see a program consuming a large amount of CPU or memory, consider closing it or limiting its activity.
By reducing resource-heavy processes, you can free up system resources and improve the performance of your external hard drive.
9. Upgrade to SSD: The Ultimate Performance Boost
If your external hard drive is an older HDD and you still find the speed lacking even after trying the above fixes, consider upgrading to an SSD. Solid-state drives are faster, more durable, and don’t suffer from mechanical wear and tear like HDDs. This is the most significant upgrade you can make, and it will transform the performance of your external storage. I made the switch to SSDs a few years ago, and I’ve never looked back. The speed difference is truly remarkable. “A solid-state drive (SSD) is a data storage device that uses solid-state memory to store persistent data,” according to Wikipedia here.
Here’s why SSDs are faster:
-
No moving parts: SSDs have no spinning platters or moving read/write heads, which means they can access data much faster than HDDs. This results in significantly faster boot times, application loading, and file transfers.
-
Faster read/write speeds: SSDs use flash memory, which allows them to read and write data much faster than the magnetic platters used in HDDs. This is especially noticeable when transferring large files or working with many small files.
-
More durable: SSDs are more resistant to physical shock and vibration than HDDs, making them a good choice for portable storage.
While SSDs are generally more expensive than HDDs, the performance benefits are well worth the investment, especially if you frequently transfer large files or work with demanding applications. You can find external SSDs in various sizes and form factors to suit your needs. Consider the capacity you need and the type of connection (USB 3.0, USB-C, Thunderbolt) when choosing an external SSD.
Preventive Measures to Maintain Drive Speed: Keeping Your Drive in Top Shape
Once you’ve restored your drive’s performance, it’s important to implement preventive measures to ensure it remains fast and functional. This is like maintaining your car – regular care and attention can help prevent problems and extend its lifespan. By following these simple tips, you can keep your external hard drive running smoothly for years to come. “Preventive maintenance is the regular and systematic inspection, adjustment, and repair of equipment to prevent failures,” according to Wikipedia here.
Here are some key preventive measures:
-
Regular Maintenance: Perform regular cleanups and defragmentations (for HDDs) to keep the drive in optimal condition. Additionally, ensure the drive is kept free of malware by running periodic virus scans. I try to run Disk Cleanup and defragmentation (if applicable) on my external drives at least once a month.
-
Avoid Overloading the Drive: Try not to fill your drive beyond 80% of its total capacity. Drives that are close to being full will always experience slowdowns. Regularly move older files to another storage device or cloud storage to keep your drive from getting too full.
-
Use Reliable Cables and Ports: Ensure you’re always using high-quality cables and compatible ports for the best speed. Avoid using low-quality or damaged cables, as these can slow down data transfer rates. Always use the cable that came with your drive or a high-quality replacement.
-
Safely Eject the Drive: Always safely eject your external hard drive from the computer before unplugging it. Sudden disconnections can lead to data corruption, which can slow down the drive over time. This is especially important if you’ve enabled the “Better Performance” policy in Windows.
By following these preventive measures, you can help ensure that your external hard drive remains fast, reliable, and free from performance issues.
Frequently Asked Questions (FAQ)
Here are some frequently asked questions about slow external hard drives, along with concise answers. I’ve compiled these based on common questions I’ve encountered and researched. Hopefully, these answers will help you troubleshoot your drive.
-
Why is my external hard drive transferring so slow?
The most common reasons are fragmentation, a nearly full drive, outdated drivers, connection issues (cable or port), software conflicts, malware, or mechanical wear and tear (for HDDs).
-
How can I speed up my external hard drive transfer?
Try these steps: check the cable and port, update or reinstall drivers, run Disk Cleanup and Defragmentation (Windows), check for malware, reformat the drive, check the drive’s health, disable Quick Removal (Windows), reduce resource-heavy processes, and consider upgrading to an SSD.
-
How fast do external hard drives transfer data?
The transfer speed depends on the interface (USB 2.0, USB 3.0, USB-C), the type of drive (HDD or SSD), and the condition of the drive. USB 3.0 can theoretically transfer data at up to 5 Gbit/s (625 MB/s), but real-world speeds are often lower. SSDs are generally much faster than HDDs.
-
Should I defrag my external hard drive?
If your external hard drive is an HDD, yes, defragmentation can improve performance. If it’s an SSD, do not defrag it, as this can shorten its lifespan. Windows should automatically optimize SSDs.
-
What file system should I use for my external hard drive?
If you’re using the drive only with Windows, use NTFS. If you need to use the drive with both Windows and macOS, use exFAT. exFAT offers better cross-platform compatibility, but NTFS generally offers better performance with Windows.