Hardware Check: Ensuring Physical Connections and Power
Before diving into the software side of things, let’s start with the basics. Often, the simplest solutions are the most effective. This is where we’ll focus on making sure everything is physically connected and powered up correctly. I remember one time, I spent hours troubleshooting a monitor issue, only to realize the power cable had come loose! It’s always a good idea to start here.
Power and Connection Verification
First things first:
- Power Source: Ensure your monitor is plugged into a working power outlet and turned on. Sometimes, a simple power cycle (turning the monitor off and on) can do the trick.
- Cable Connections: Check the cable connecting your monitor to your computer. Make sure it’s securely plugged into both the monitor and the computer’s video output port (HDMI, DisplayPort, DVI, or VGA). A loose connection is a frequent culprit. I’ve found that sometimes, unplugging and replugging the cable firmly can resolve the issue.
- Port Check: If your monitor and/or graphics card have multiple ports, try connecting to a different port. The port you’re using might be faulty.
- Graphics Card vs. Motherboard: If you have a desktop computer with a dedicated graphics card (also known as a GPU), ensure your monitor cable is connected to the ports on the graphics card, not the motherboard. The graphics card ports are usually located lower down on the back of your computer and may have a different layout than the motherboard ports.
- Cable Inspection: Examine the cable for any physical damage. A damaged cable can prevent the monitor from receiving a signal. If you have a spare cable of the same type, try using it to rule out a faulty cable.
- Input Source: Make sure your monitor is set to the correct input source. Most monitors have multiple input options (HDMI 1, HDMI 2, DisplayPort, etc.). Use the monitor’s menu buttons to select the input that matches the cable you’re using. I once spent a frustrating hour before realizing I had the wrong input selected!
- Docking Station: If you’re using a docking station, ensure it’s powered on and properly connected to your laptop. Try connecting the monitor directly to your laptop to see if the docking station is causing the problem.
- Peripheral Conflicts: Disconnect any unnecessary peripherals (printers, cameras, USB devices) to see if they are interfering with the display.
- Restart: Finally, restart your computer. This simple step can often resolve minor glitches that might be preventing the monitor from being detected.
These initial checks are crucial. They eliminate the most common and easily fixable problems before you start tinkering with software settings.
Troubleshooting with Different Cables and Devices

If the basic checks don’t work, consider these additional steps:
- Cable Swap: If possible, swap the cable with a known working one. This helps determine if the original cable is the issue.
- Monitor Test: Connect the monitor to another computer or device (like a game console) to see if it works. This will help you determine if the problem is with the monitor itself.
- Graphics Card Test: If you have another monitor, try connecting it to your computer to see if it’s detected. This helps determine if the problem is with your graphics card.
- Docking Station Test: If you’re using a docking station, try connecting the monitor directly to your laptop to bypass the dock. If the monitor is detected when connected directly, the docking station might be the issue.
By systematically checking these hardware components, you can pinpoint whether the problem lies with the monitor, the cable, the computer’s ports, or the graphics card.
Software Solutions: Adjusting Display Settings and Forcing Detection
If the hardware checks don’t reveal any issues, it’s time to move on to software solutions. Windows has built-in tools and settings that can help detect and configure external monitors. Let’s explore these options.
Forcing Monitor Detection in Windows Settings
Windows provides a straightforward way to manually detect external monitors. Here’s how to do it:
- Open Settings: Click the “Start” button, then click the “Settings” icon (it looks like a gear).
- Navigate to Display Settings: In the Settings app, click on “System,” then select “Display.”
- Multiple Displays: Scroll down to the “Multiple displays” section.
- Detect: Click the “Detect” button. Windows will scan for connected monitors.
If your monitor is detected, you should see it appear in the display settings. You can then configure how you want to use the monitor (extend the display, duplicate the display, etc.). If the “Detect” button doesn’t work, try restarting your computer after clicking it.
Adjusting Display Settings for Multiple Monitors
Once your monitor is detected, you can adjust the display settings to suit your needs.
- Extend Displays: This option extends your desktop across both monitors, giving you more screen real estate. You can drag windows between the monitors.
- Duplicate Displays: This option mirrors the content of your primary monitor onto the second monitor. This is useful for presentations.
- Show only on 1/2: This option disables one of the monitors, showing content only on the selected display.
- Rearrange Displays: You can rearrange the monitors in the display settings to match their physical layout. This ensures that your mouse cursor moves correctly between the screens.
- Identify: Click the “Identify” button to display a number on each monitor, helping you identify which monitor is which.
Experiment with these settings to find the configuration that works best for you.
Connecting a Wireless Display
If you have a wireless display (like a smart TV or a device with Miracast support), you can connect it to your computer wirelessly.
- Ensure Wireless Display is Ready: Make sure your wireless display is turned on and in pairing mode. Refer to your display’s manual for instructions on how to do this.
- Open the Cast Menu: Press the “Windows key + K” keys simultaneously. This will open the “Cast” menu.
- Select Your Display: In the list of available displays, click on the wireless display you want to connect to.
- Change Projection Mode (Optional): Once connected, you can change the projection mode (duplicate, extend, etc.) by clicking “Change projection mode” in the Cast menu.
Wireless displays can be a convenient way to add a second screen, especially if you don’t want to deal with cables.
Driver Updates: Ensuring Compatibility and Performance
Outdated or corrupted graphics drivers are a common cause of monitor detection problems. Drivers are essential software components that allow your operating system to communicate with your hardware. Keeping your drivers up-to-date is crucial for optimal performance and compatibility.
Updating Graphics Drivers Through Windows Update

Windows Update can sometimes provide updated graphics drivers. Here’s how to check:
- Open Settings: Click the “Start” button, then click the “Settings” icon.
- Go to Update & Security: Click on “Update & Security.”
- Check for Updates: Click “Windows Update” and then click “Check for updates.” Windows will search for and install any available updates, including driver updates.
- View Optional Updates: If available, click “View optional updates.”
- Driver Updates: Select “Driver updates” and check if there are any graphics driver updates available.
- Download and Install: Select the graphics driver and click “Download and install.”
After installing the driver, restart your computer.
Updating Graphics Drivers Using Device Manager
You can also update your graphics drivers through Device Manager.
- Open Device Manager: Right-click the “Start” button and select “Device Manager.”
- Expand Display Adapters: In Device Manager, expand the “Display adapters” section.
- Update Driver: Right-click on your graphics card (e.g., Intel HD Graphics, NVIDIA GeForce, AMD Radeon) and select “Update driver.”
- Search Automatically: Choose “Search automatically for drivers.” Windows will search for and install the latest driver.
- Restart: Restart your computer after the driver installation is complete.
Updating Graphics Drivers from the Manufacturer’s Website
The most reliable way to get the latest drivers is to download them directly from your graphics card manufacturer’s website.
- Identify Your Graphics Card: Determine your graphics card model (e.g., NVIDIA GeForce RTX 3070, AMD Radeon RX 6800, Intel Iris Xe Graphics). You can find this information in Device Manager or by searching your computer’s specifications.
- Visit the Manufacturer’s Website: Go to the website of your graphics card manufacturer (NVIDIA, AMD, or Intel).
- Download the Driver: Find the driver download section and search for your graphics card model. Download the latest driver for your operating system (Windows 10 or Windows 11).
- Install the Driver: Run the downloaded installer and follow the on-screen instructions to install the driver.
- Restart: Restart your computer after the driver installation is complete.
I’ve found that using the manufacturer’s drivers often resolves compatibility issues that Windows Update might miss.
Reinstalling Graphics Drivers
If updating the driver doesn’t work, try reinstalling it. This can fix corrupted driver files.
- Open Device Manager: Right-click the “Start” button and select “Device Manager.”
- Expand Display Adapters: Expand the “Display adapters” section.
- Uninstall Driver: Right-click on your graphics card and select “Uninstall device.”
- Delete Driver Software (Optional): In the uninstall confirmation window, check the box that says “Delete the driver software for this device” (if available). This will remove the old driver files.
- Uninstall: Click “Uninstall.”
- Restart: Restart your computer. Windows will attempt to reinstall the driver automatically.
- Scan for Hardware Changes (If Needed): If the driver isn’t reinstalled automatically, open Device Manager again, right-click on your computer name at the top of the device list, and select “Scan for hardware changes.”
Rolling Back Graphics Drivers

If the problem started after a recent driver update, you can roll back to a previous driver version.
- Open Device Manager: Right-click the “Start” button and select “Device Manager.”
- Expand Display Adapters: Expand the “Display adapters” section.
- Open Driver Properties: Right-click on your graphics card and select “Properties.”
- Go to the Driver Tab: Click the “Driver” tab.
- Roll Back Driver: If the “Roll Back Driver” button is available, click it. Follow the on-screen instructions.
- Restart: Restart your computer.
If the “Roll Back Driver” button is grayed out, it means there’s no previous driver to roll back to.
Advanced Troubleshooting: Registry Edits and Refresh Rate Adjustments
If the basic and intermediate steps haven’t resolved the issue, it’s time to explore some more advanced troubleshooting techniques. These methods involve modifying system settings and should be approached with caution.
Editing the Registry (Advanced Users Only)
Warning: Editing the Windows Registry can be risky. Incorrect changes can cause serious system problems. Back up your registry before making any changes.
- Open Registry Editor: Press “Windows key + R,” type “regedit,” and press Enter.
-
Navigate to the Graphics Drivers Key: In the Registry Editor, navigate to the following key:
HKEY_LOCAL_MACHINE\SYSTEM\CurrentControlSet\Control\GraphicsDrivers - Create a New DWORD Value: Right-click in the right pane, select “New” > “DWORD (32-bit) Value.”
- Name the Value: Name the new value “TdrDelay.”
- Set the Value Data: Double-click “TdrDelay” and set the “Value data” to “8.”
- Restart Your Computer: Restart your computer for the changes to take effect.
This registry edit increases the time the GPU has to process tasks, which can sometimes help with monitor detection issues.
Resetting Windows 11 Display Settings
Sometimes, a fresh start can resolve lingering issues. Resetting your display settings to their defaults can eliminate any incorrect configurations causing the problem.
-
Open Windows Settings: Press
Win + Ito open the Settings app. - Navigate to System > Display: Here you can find various display settings.
- Reset Display Settings: Look for an option to reset the display settings to their default. If there’s no direct option, you may need to manually adjust the settings to their original state, based on your system’s default configuration.
- Check for Monitor Detection: After resetting, check if Windows 11 now detects your second monitor.
Adjusting Monitor Refresh Rate
Sometimes, the refresh rate of your monitor can cause detection problems. Try adjusting the refresh rate to see if it resolves the issue.
- Open Settings: Open the Settings app (Windows key + I).
- Go to System > Display: Click on “System,” then select “Display.”
- Advanced Display Settings: Scroll down and click on “Advanced display settings.”
- Select Your Monitor: Select your second monitor from the dropdown menu.
- Choose a Refresh Rate: Under “Choose a refresh rate,” try selecting a different refresh rate (e.g., 60Hz).
Experimenting with different refresh rates can sometimes resolve compatibility issues.
Alternative Solutions: USB Adapters and Docking Stations
If you’ve exhausted all the software and hardware troubleshooting steps, there are a couple of alternative solutions you can try.
Using a USB Adapter
A USB adapter can bypass your graphics card’s output and provide an alternative way to connect your monitor.
- USB to HDMI/DisplayPort Adapters: These adapters connect to a USB port on your computer and provide an HDMI or DisplayPort output for your monitor.
- Compatibility: Make sure the adapter is compatible with your computer’s USB port (USB 3.0 or USB-C is recommended).
- Driver Installation: You may need to install drivers for the USB adapter. Follow the instructions provided with the adapter.
USB adapters can be a good solution if your graphics card’s ports are not working or if you need an extra display output.
Using a Docking Station
A docking station can provide multiple ports for connecting external monitors and other peripherals.
- Docking Station Features: Look for a docking station that supports multiple displays and has the necessary ports (HDMI, DisplayPort, USB-C).
- Compatibility: Ensure the docking station is compatible with your laptop.
- Driver Installation: You may need to install drivers for the docking station. Follow the instructions provided with the docking station.
Docking stations can simplify your setup and provide a convenient way to connect multiple monitors and other devices.
Troubleshooting with Experience and Expertise
Throughout my years of working with computers, I’ve learned that patience and a systematic approach are key to troubleshooting display issues. Don’t get discouraged if the first solution doesn’t work. Keep trying different methods until you find the one that resolves the problem.
Common Mistakes to Avoid

- Ignoring the Basics: Always start with the simple checks (power, connections, input source) before moving on to more complex solutions.
- Incorrect Driver Installation: Make sure you download the correct driver for your graphics card and operating system.
- Not Restarting: Restart your computer after making changes to drivers or display settings.
- Assuming Hardware Failure: Don’t immediately assume your monitor or graphics card is broken. Try all the troubleshooting steps before considering hardware replacement.
Tips for Best Results

- Keep Drivers Updated: Regularly update your graphics drivers to ensure optimal performance and compatibility.
- Read the Manual: Consult your monitor’s and graphics card’s manuals for specific troubleshooting tips.
- Use a Quality Cable: Use a high-quality HDMI or DisplayPort cable to ensure a reliable connection.
- Test with Different Devices: If possible, test your monitor and cable with other devices to isolate the problem.
Benefits and Expected Outcomes
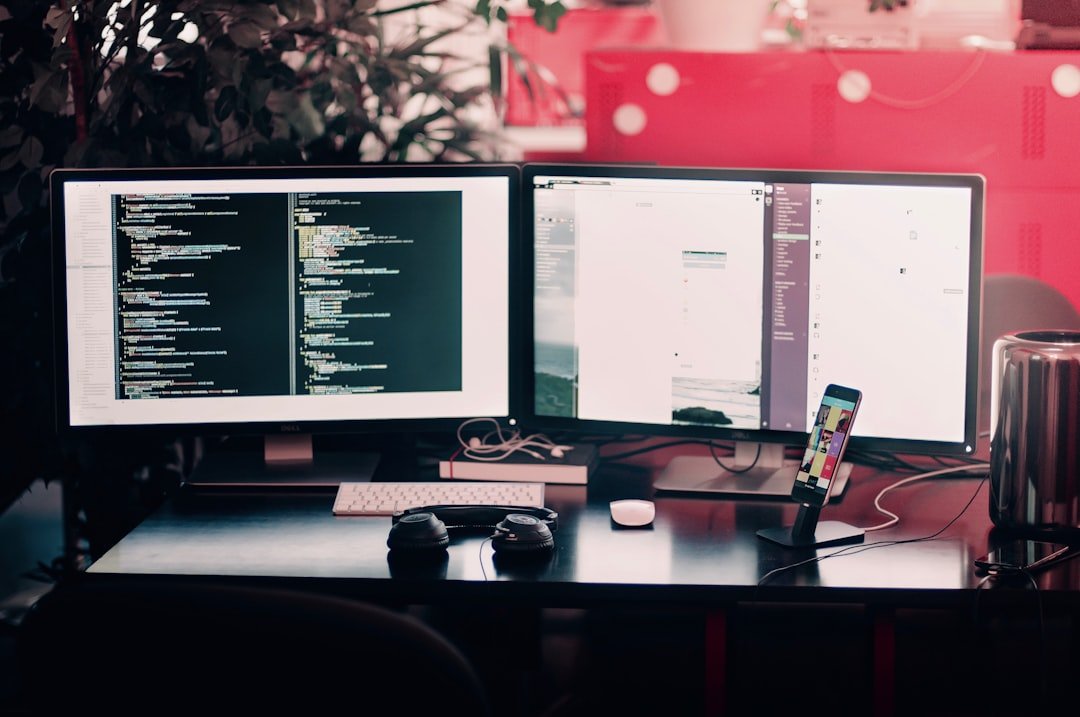
By following these troubleshooting steps, you should be able to resolve the issue of your second monitor not being detected and restore your dual-screen setup. The benefits of having a second monitor include:
- Increased Productivity: Multitask more efficiently by having multiple applications open at once.
- Improved Workflow: Organize your workspace and streamline your workflow.
- Enhanced Gaming Experience: Enjoy a more immersive gaming experience.
Frequently Asked Questions (FAQ)
Here are some frequently asked questions about the “second monitor not detected” issue:
-
Why isn’t my second monitor being detected?
The most common causes are loose connections, outdated or corrupted graphics drivers, incorrect display settings, or hardware compatibility issues.
-
How do I force Windows to detect my second monitor?
Go to Settings > System > Display and click the “Detect” button under “Multiple displays.”
-
How do I update my graphics drivers?
You can update drivers through Windows Update, Device Manager, or by downloading the latest drivers from your graphics card manufacturer’s website.
-
What should I do if the “Roll Back Driver” button is grayed out?
This means there’s no previous driver to roll back to. You can try updating or reinstalling the driver instead.
-
Should I use a USB adapter or docking station?
These are good options if your graphics card’s ports are not working or if you need additional display outputs. Make sure the adapter or docking station is compatible with your computer.
I hope this comprehensive guide helps you resolve the issue of your external monitor not being detected. Remember to be patient, follow the steps systematically, and don’t hesitate to seek further assistance if needed. With a little troubleshooting, you’ll be back to enjoying the benefits of a dual-screen setup in no time.
